We all enjoy taking pictures, and in today’s world, it happens a lot. Now, you might have faced a situation where some important photos are blurry, and you really want to fix that, right?
No need to worry, Nowadays, in our modern world, it’s not a problem anymore.
Photoshop is like a superhero for your photos. You know when your pictures look a bit unclear? Well, Photoshop comes to the rescue! It does this cool thing where it makes your blurry photos look really clear and sharp, like magic.
Today, I will show you a simple, step by step guide. It will help you save your important pictures and make you feel happy again..
![]()
METHOD 1 TO CLEAR BLURRY PICTURE IN PHOTOSHOP
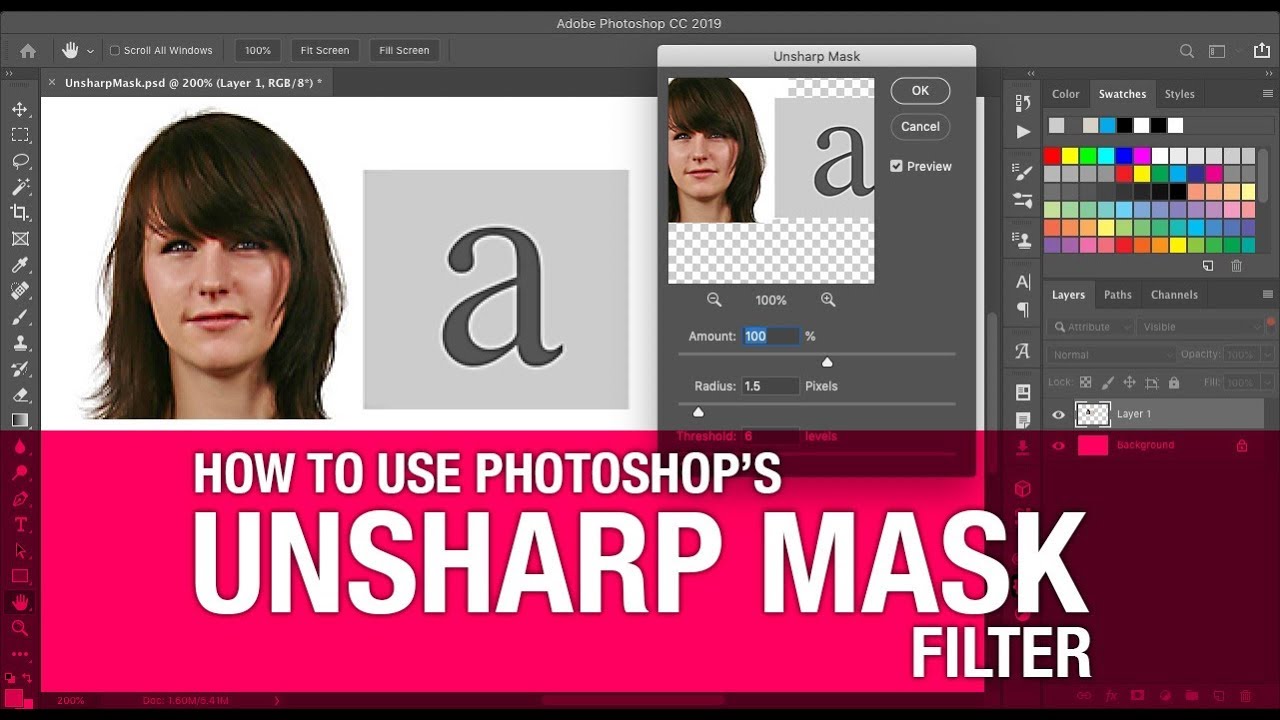
Step 1: Unsharp Mask Filter
- Open your blurry photo in Photoshop.
- Copy the photo to have a backup so you don’t lose your original photo.
- Go to Filter- Sharpen – Unsharp Mask.
- Change the settings: move “Amount” a bit to the right, adjust “Radius,” and try different “Threshold” values until it looks better.
- Carefully check the preview.
- Click OK when you’re satisfied.
After Step 1: Your photo now has enhanced sharpness. Moving on to refine it further with Step 2.
Step 2: Smart Sharpen
- Duplicate your photo layer for flexibility.
- Convert it to a Smart Object to allow easy editing for you without breaking anything.
- Navigate to Filter – Sharpen – Smart Sharpen.
- Increase “Amount” for sharper details.
- Set “Radius” to decide where you want it sharp.
- Consider “Reduce Noise” if there’s too much grainy stuff..
- Click OK to apply the changes.

After Step 2: Your photo gains more clarity. Proceeding to Step 3 for an artistic touch.
Step 3: High Pass Filter
- Adjust the “Radius” to add a grayscale effect.
- Try different styles like Overlay or Soft Light to see which one makes your photo look the best.

After Step 3: Your photo gets a unique visual effect. Now, let’s address shaky hands in Step 4.
Step 4: Shake Reduction Filter
- Go to Filter -Sharpen – Shake Reduction.
- Let Photoshop check and fix blurriness from shaky hands.

After Step 4: Your photo is now more stable. Moving to the final touch with Step 5.
Step 5: Sharpen Tool
- Open your photo.
- Select the Sharpen tool from the toolbar.
- Adjust the brush settings the way you like them.
- Click and drag over specific areas you want to sharpen.

After Step 5: Your photo undergoes precise adjustments. Check the final result, and if satisfied, you’ve successfully sharpened your image
METHOD 2 Enhancing Clarity with High Pass Filter
- Start with Two Copies:
- Open your original photo.
- Create a duplicate, so you have two identical images.
- Smart Object Move:
- Right click on the duplicated photo.
- Choose Convert to Smart Object.
- High Pass Magic:
- Go to Filter – Other – High Pass.
- Adjust the slider until you see outlines.
- Blend with Overlay:
- Change the duplicated layer to Overlay.
- Your photo gains sharpness, like an upgrade.
- Change the clearness level:
-
- Make it better by adjusting see-through (opacity).
- Find the level that makes your photo very clear.
- Hide Unwanted Parts:
-
- If some areas shouldn’t be super clear, use a brush.
- Paint those parts black to maintain a bit of mystery.
- Check the Superpower:
-
- Zoom in to see the amazing change.
- Save your now-super-clear photo and feel accomplished!
Using the High Pass Filter is like giving your photo special glasses. It’s an easy upgrade for a clearer picture!
BONUS TIP Vanish Unwanted Stuff Easily
If there’s something in your photo you don’t like, no worries! We’ll make it better.
Remove the Unwanted:
Click on the thing you want to get rid of
Go to Edit:
Find “Edit” at the top.
Select Content-Aware Fill:
Click on Content Aware Fill.
Agree to the Magic:
Click “OK.”
Poof! It’s Gone:
Check your photo – the unwanted thing is gone!
Save Your Improved Photo:
Click “File” and choose “Save.” Your photo is now better and ready to go!
With Content-Aware Fill, making things disappear is as easy as 1-2-3!
FAQS
What to Expect When Sharpening Photos with Photoshop
As we finish fixing blurry photos with Photoshop, let’s be real about what to expect. Photoshop does a great job making slightly blurry pics awesome. But, if your photo is super blurry from lots of shaking or low quality, the improvement might be limited. Photoshop’s magic is powerful, but it can only do so much. So, as you try these steps, cheer for the clearer pics, knowing that some moments are just meant to stay a bit fuzzy, like memories in your mind.
Q: How can I make blurry photos clearer using noise reduction?
A: Making blurry photos better with noise reduction is like giving your picture a cleanup. First, open your photo in the editing tool. Then, make a copy of it, so you have a backup. Look for the noise reduction option – it’s like a special tool that helps remove fuzziness. Adjust the settings until your photo looks clearer, but be careful not to lose the important stuff. Keep checking the preview to see if it’s getting better. Once you’re satisfied, save your cleaned-up photo. It’s a bit like using magic to tidy up your picture!
Q: Can I undo changes if I’m not satisfied with the sharpening result in Photoshop?
A: Absolutely! Photoshop allows you to work non-destructively. Always make duplicates or use adjustment layers before applying changes. If you’re unhappy with the sharpening result, you can go back to the original or adjust the settings until you achieve the desired outcome.
Q: How do I know if my photo needs sharpening in Photoshop?
A: If your photo looks a bit soft, lacks crisp details, or the edges seem fuzzy, it might benefit from sharpening in Photoshop. Additionally, zooming in on the image and noticing a lack of clarity in specific areas can indicate the need for sharpening.
Conclusion
Fixing blurry pictures with Photoshop is like a magic trick. We used tools like Unsharp Mask and Smart Sharpen to make pictures clearer. High Pass Filter and Shake Reduction added extra help, and Content-Aware Fill removed things we didn’t like.
High Pass Filter is like special glasses, making pictures super clear easily. If you make a mistake,don’t worry , you can go back. But remember, if a picture is very blurry, it might stay a bit fuzzy.
For noise reduction, copy, adjust, and save. If you don’t like it, you can go back with the undo button. Explore, find your way, and let your pictures tell stories with their new clarity. Have fun editing!
